macOS & Workspace ONE product provisioning tutorial: Deploying Pulse Secure VPN
March 18, 2021 / Unisys Corporation
Deploying applications on macOS is made easy through Workspace ONE™ unified endpoint management (UEM), with the software distribution methods built into the VMware platform. However, it can become more complicated when applications have special configuration needs, such as transformation files or scripts. This is where the product provisioning tool in Workspace ONE UEM can be helpful.
Unisys can help you extend your macOS management skills with product provisioning on Workspace ONE UEM.
What is a product provisioning system?
The product provisioning system arranges an ordered installation of configurations, applications and files/actions into one product, which is then pushed to devices based on the conditions you create.
In the case of macOS, this will help you install applications and configure them to your specific needs by utilizing files that can be placed anywhere on your Mac and executing terminal commands or scripts to accomplish your desired goals.
Audience
This article is written for:
- Workspace ONE administrators
- MacAdmins
Prerequisites
- macOS 10.7+ devices: MacBook Pro, MacBook Air, Mac Mini, iMac, Mac Pro
- Workspace ONE UEM version 18.xx+
The scenario
This example will deploy a VPN client application called Pulse Secure onto your fleet of macOS terminals.
This application has a specific configuration file allowing the automatic configuration of a user's VPN client for their company.
For the system to work properly, the application must first be installed, and then the file must be dropped and executed with a specific terminal command.
To accomplish this, follow these steps:
- Deploy the .pkg of the Pulse Secure app on the Mac.
- Drop the Pulse Secure client configuration file.
- Install the Pulse Secure application.
- Execute the configuration command from the configuration file dropped in Step 2.
These steps can be completed at once by creating a Workspace ONE product, which is what will be explored next.
Building the product
Creating a Files/Actions component
First, log in as an administrator to your C drive and select the desired organizational level to create your product. It’s important to note that in our example, we are currently using the latest version of the Workspace ONE UEM console as of March 2021.
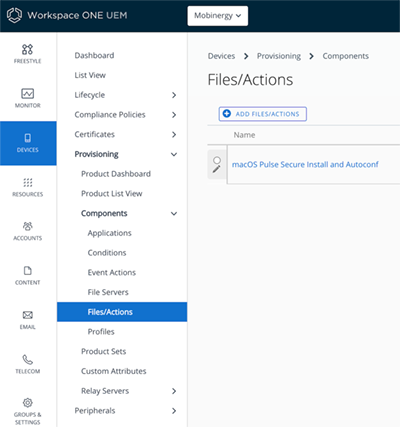
Navigate to Devices > Provisioning > Components > Files/Actions and select Add Files/Actions.
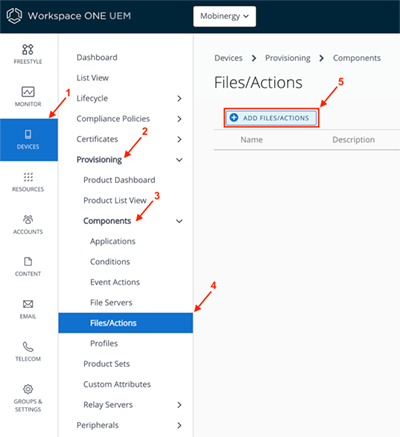
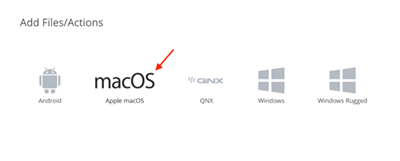
From there, select the macOS platform.
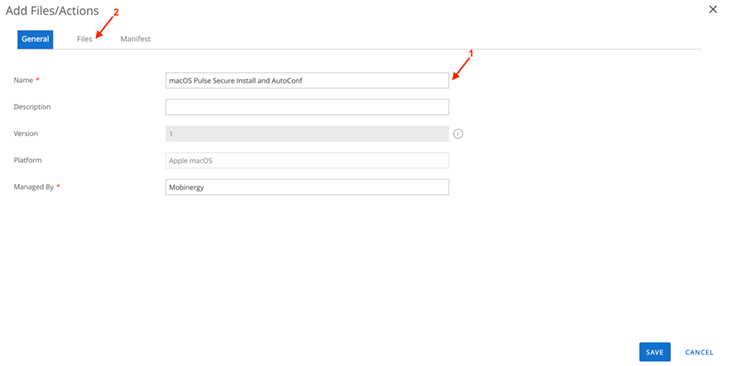
A window will open that will allow you to prepare your Files/Actions. The first tab labeled General will enable you to define a name for your Files/Actions. Enter a name and click on the second tab named Files.
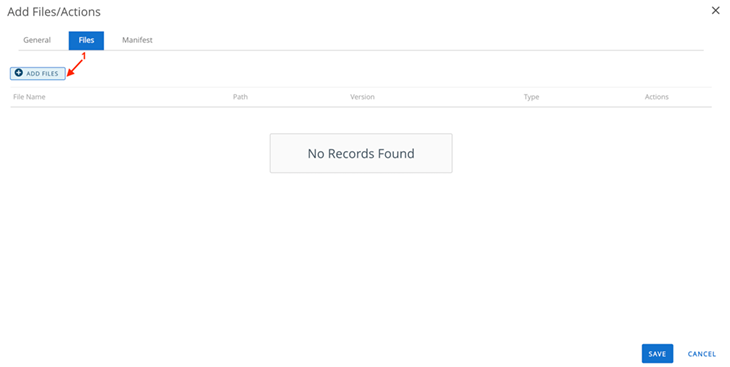
Under the Files tab, click on the Add Files button. A pop-up window will allow you to upload the desired files to build your product. By clicking on Select Files, you can browse your file system to select the desired files.
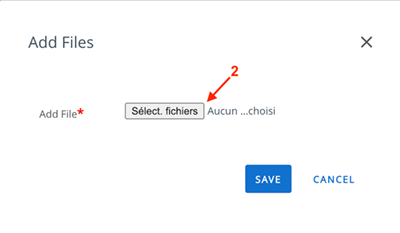
For the first file, choose the .pkg of the Pulse Secure app previously retrieved from the editor's website. Then click Save to upload the file to Files/Actions in Workspace ONE.
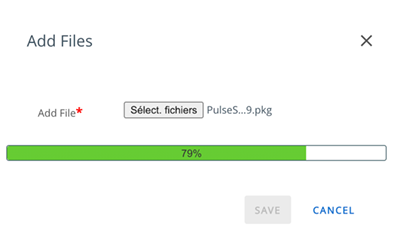
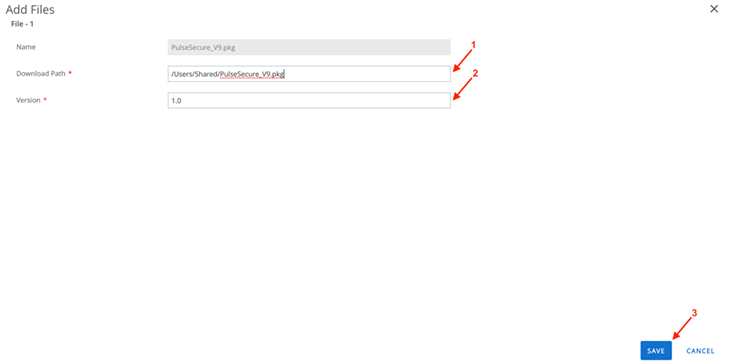
At the end of the upload, a new window opens automatically to configure the parameters of the .pkg deposit on the target macOS. In the Download Path field, indicate where you want the Pulse Secure .pkg to be dropped in the macOS of your fleet. We advise you to choose a general or universal location. For example, we chose the folder /Users/Shared/filename.
You also need to indicate a version number relative to Workspace ONE. We suggest starting with 1.0.
Finish by clicking Save.
The Pulse Secure application .pkg should now be added to your Files/Actions Workspace ONE UEM and should appear listed.
Repeat the same action for the Pulse Secure client configuration file.
Click the ADD FILES button again.
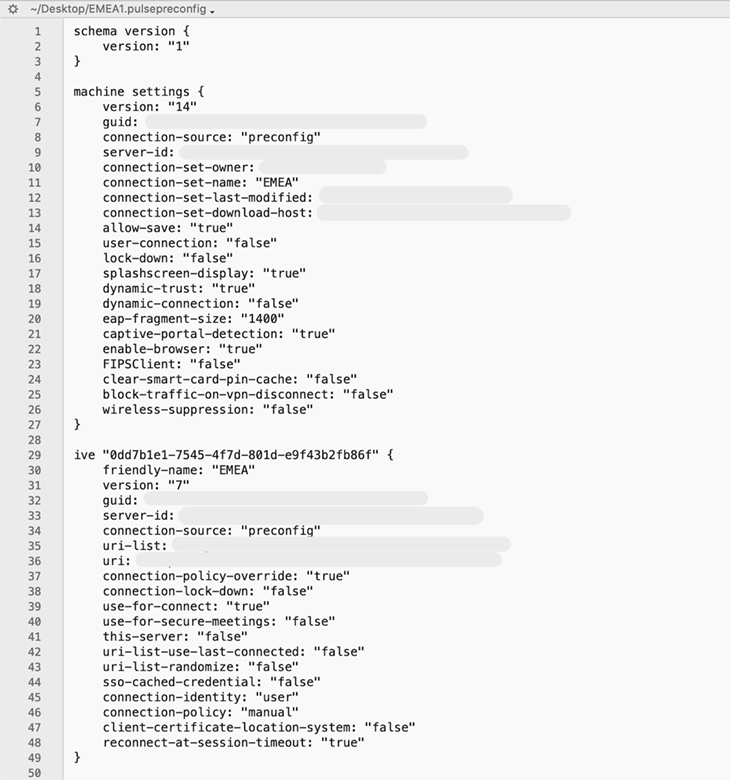
The .pulsepreconfig file is a simple text file containing information about the company VPN. Use a specific command in the product to configure the Pulse Secure client with this config file. The VPN Editor support team provides this file.
Once again, drop this file in the /Users/Shared folder.
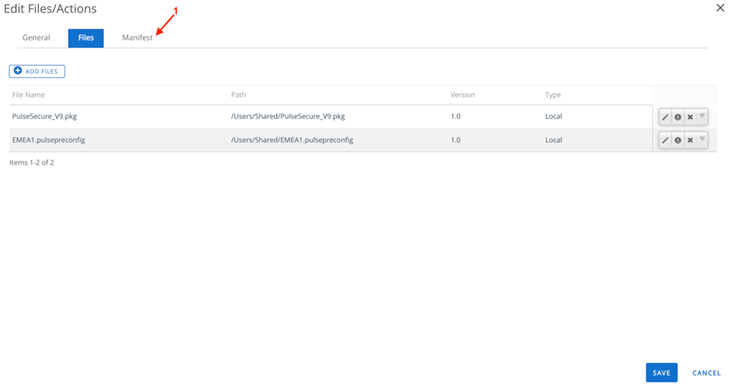
When the upload is finished, you can see the list of uploaded files in Product and where they will be dropped in the macOS terminal.
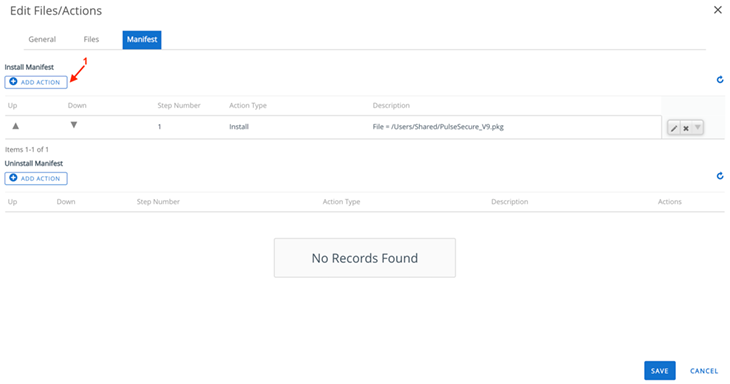
Now click on the Manifest tab to the right of the Files tab.
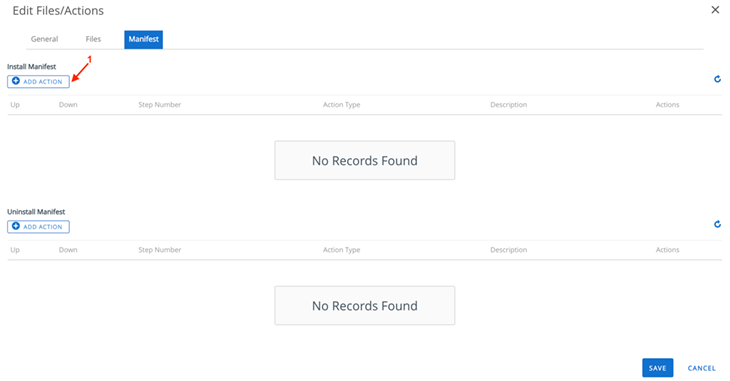
Under the Manifest tab, you can indicate the actions that your Files/Actions will carry out within the product and in which order.
Start by clicking on the ADD ACTION button.
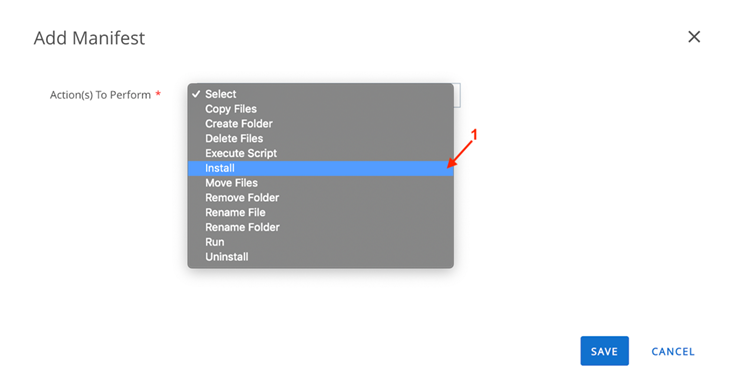
A new window will open, prompting you to indicate the first action to be performed by your product.
To install your Pulse Secure application, choose the Install action in the drop-down menu.
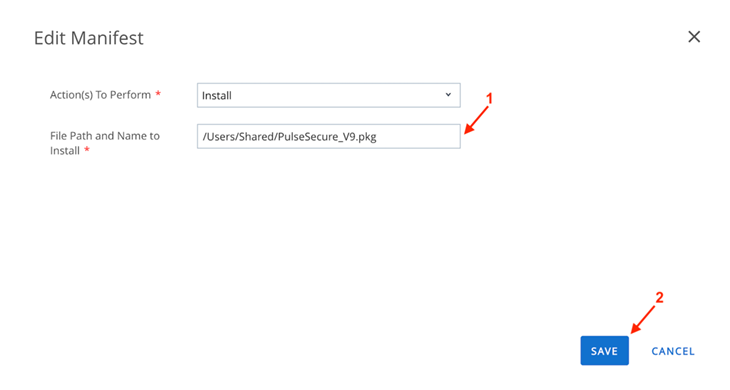
When the Install action is selected, you can enter the path to the package that the macOS terminal should install.
In our example, we install the PulseSecure_V9.pkg app, which we put in the /Users/Shared folder using the previous steps.
Finish creating this action by clicking on the Save button.
After saving, you can find the list of actions and the first action you created, namely:
- Install the Pulse Secure client.
Next, you will create the second action to configure the Pulse Secure VPN Client, which was automatically installed through the configuration file.
Click the ADD ACTION button again.
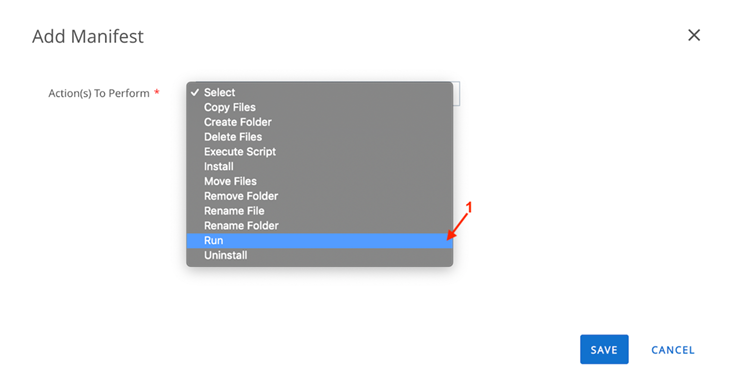
For this second action, select the "Run" action from the drop-down menu to execute a command.
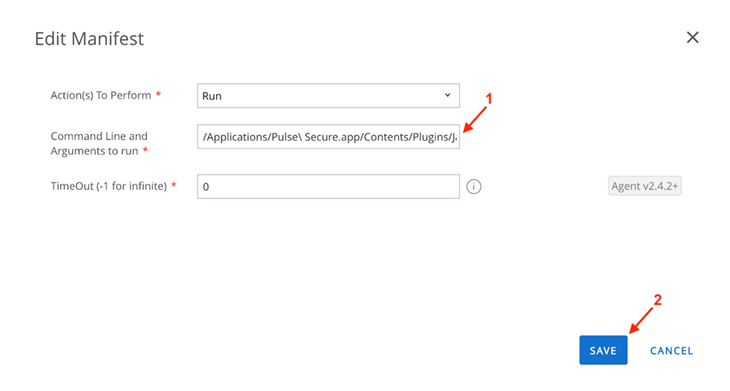
Once you select the Run action, enter the command the macOS terminal will execute.
The command is the following:
/Applications/Pulse\Secure.app/Contents/Plugins/JamUI/jamCommand -importFile /Users/Shared/EMEA1.pulsepreconfig
Call the jamCommand binary in the Pulse Secure app installation folder and ask it to read and parse the configuration file in the /Users/Shared folder.
Press SAVE to complete.
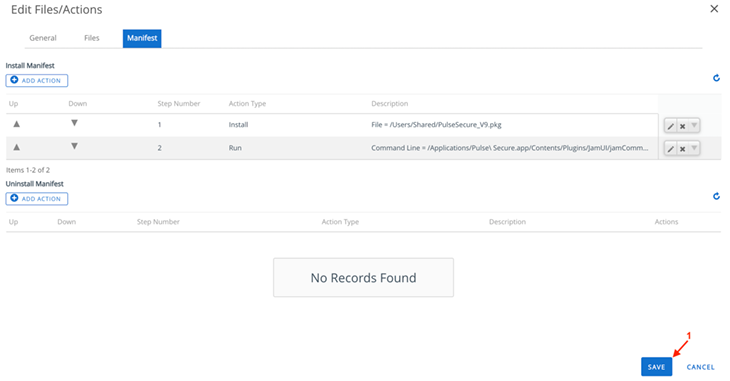
The list of actions should now be visible and complete. Actions will be carried out in the order they appear on the list. It is possible to rearrange them using the arrows in the columns on the left.
The Files/Actions component first performs the events on the Files tab and then those on the Manifest tab.
To summarize, we have shown you how to implement the workflow mentioned at the beginning through the Files/Actions component, namely:
- Deploy the .pkg of the Pulse Secure app on the Mac (Files Tab)
- Drop the Pulse Secure client configuration file (Files Tab)
- Install the Pulse Secure application (Manifest Tab)
- Execute the configuration command from the configuration file dropped in Step 2 (Manifest Tab)
Finish the creation of your Files/Actions by clicking on SAVE.
Your Files/Actions component should now be created and visible in the list view. Now you can create the product to push it onto your macOS fleet.
Creating the product
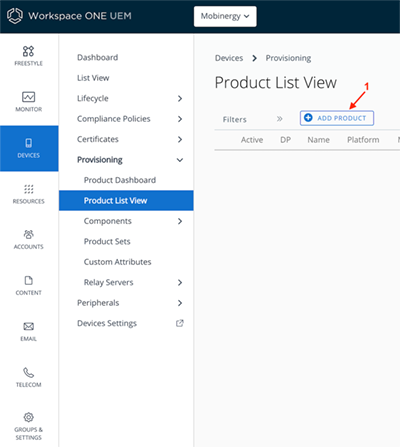
While still in your Workspace ONE UEM console, navigate to Devices > Provisioning > Product List View.
From here, click on the ADD PRODUCT button.
As with your File/Action component, select the macOS platform.

The Add Product configuration will window open, and you can now configure it.
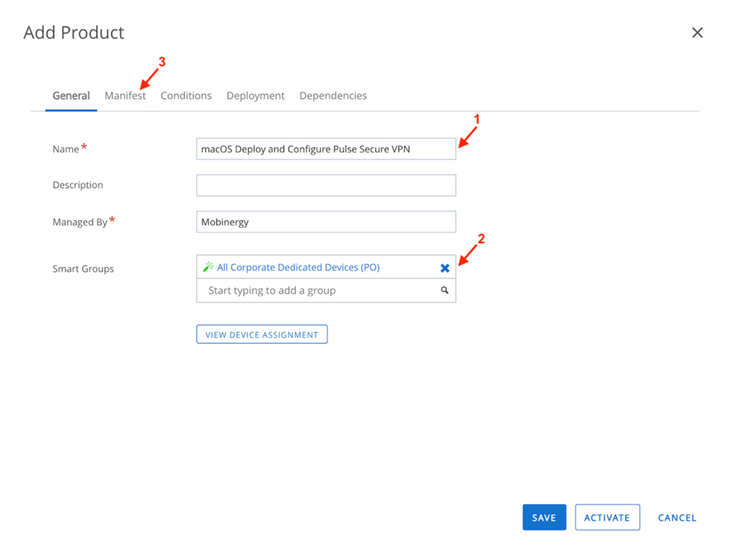
On the General tab, specify a name that will appear in the products list display. You can also see the organizational level where it will be created and need to select an assignment for your product by indicating the target group for deployment (Smart Group or Organization).
Then click on the Manifest tab.
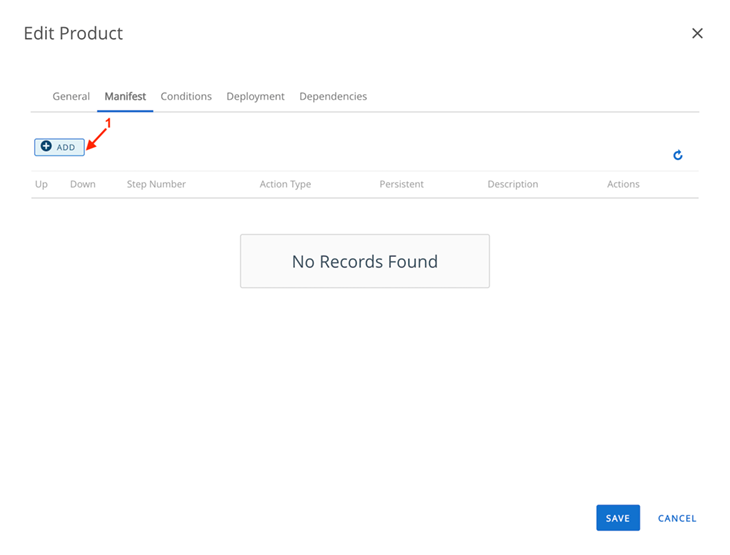
The Manifest tab will allow you to indicate the File/Action components you want to put in your product.
Then click on ADD.
From there, the Add Manifest window will open, and you can select the File/Action - Install option.
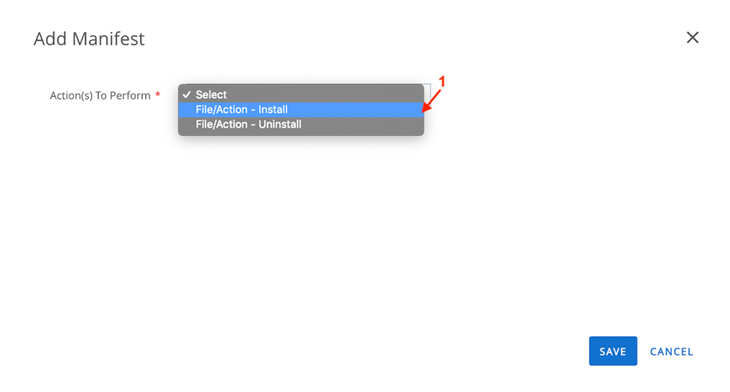
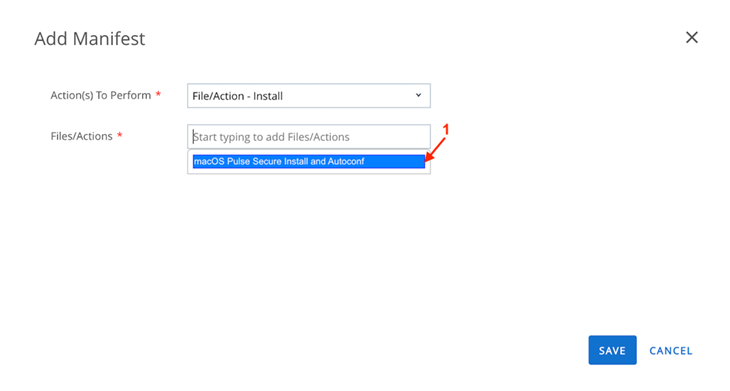
This allows you to select our File/Action component created in the previous steps from the drop-down menu.
Finish by clicking on the SAVE button.
You can now see your File/Action component listed in the Manifest tab of the product to execute the directives.
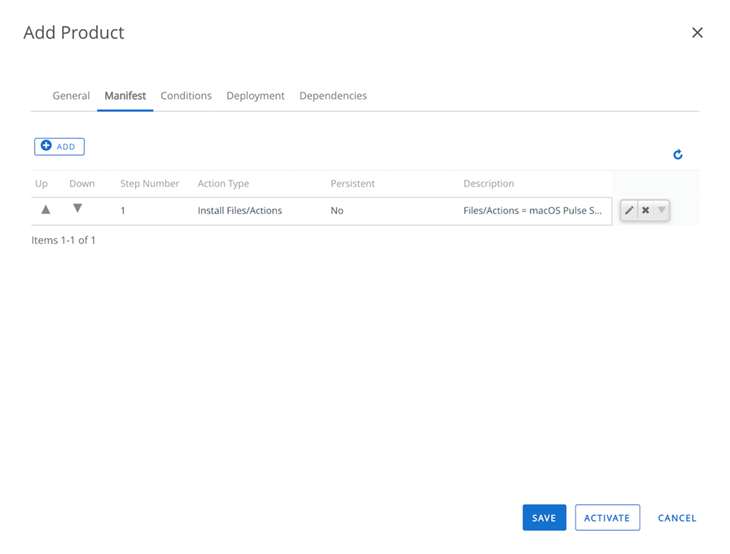
You can also find the Conditions tab, which allows you to add execution parameters for the product such as environment constraints or interactions with the user. These conditions must be created within the menu of the same name using the same process as the File/Action components.
The Deployment tab allows you to set a precise date and time for the installation and execution of your product.
Finally, the Dependencies tab allows you to create links between products to make them dependent. Example: Product B will only be installed when Product A has finished its execution.
We will leave these tabs in their default settings as we do not need these options in our example.
Finish creating your product by clicking SAVE.
Finally, you will be brought to the Product List View and can view your newly created product.
The red dot in front of the product name indicates it is inactive.
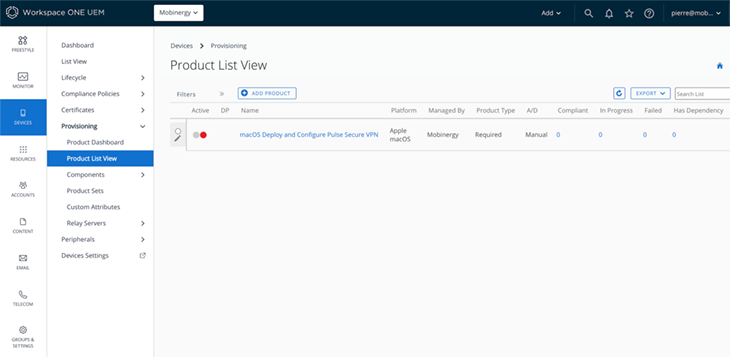
To activate the product, click on the gray dot to the left of the red one. It will turn green, indicating the product is active and deploying to your macOS devices.
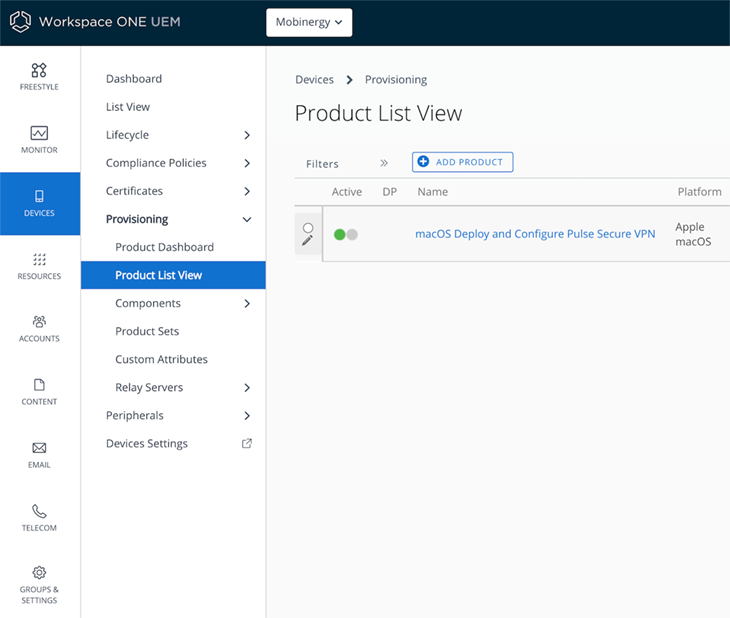
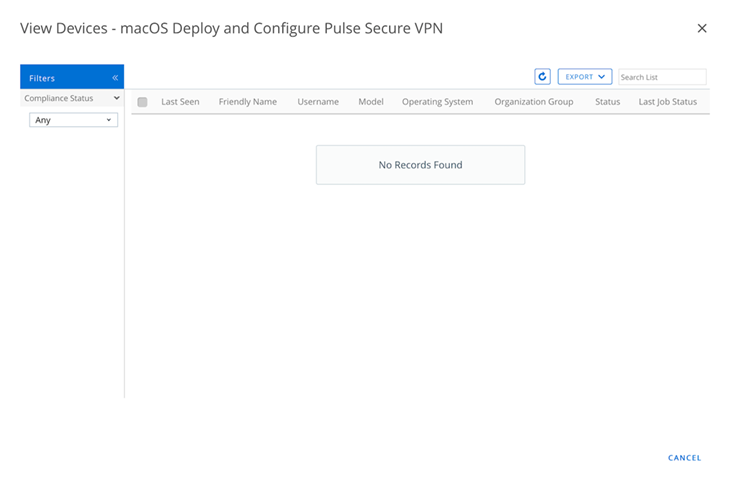
Thanks to the real-time deployment status of the Workspace ONE UEM console, you can see the installation status of the product. This is represented by the numbers displayed on the product name line. You can click on any number to access your deployment information and track any problems.

Mission complete
Thanks to Workspace ONE UEM's product provisioning tool, you can create a complex workflow that carries out a precise scenario on your macOS terminals.
In a single product, you can drop a configuration file in the Pulse Secure VPN app, install it, and run a command to configure it.
There are many other uses and fields of application for Workspace ONE UEM products. With the capabilities outlined in this article, you can perform complex and advanced actions.
Good luck in the creation of your future macOS products!
Learn more about how Unisys can help you manage and secure all enterprise devices with Modern Device Management.


